How to Fix Single-Handle Faucet Leak?
A leaking faucet is not only an annoying sound, but it can also lead to water waste and higher bills. If you have a single-handle faucet that is dripping, you can fix it yourself with a few basic tools and some patience. In this article, we will guide you through the steps to repair your dripping faucet.
Tools and Materials You Will Need:
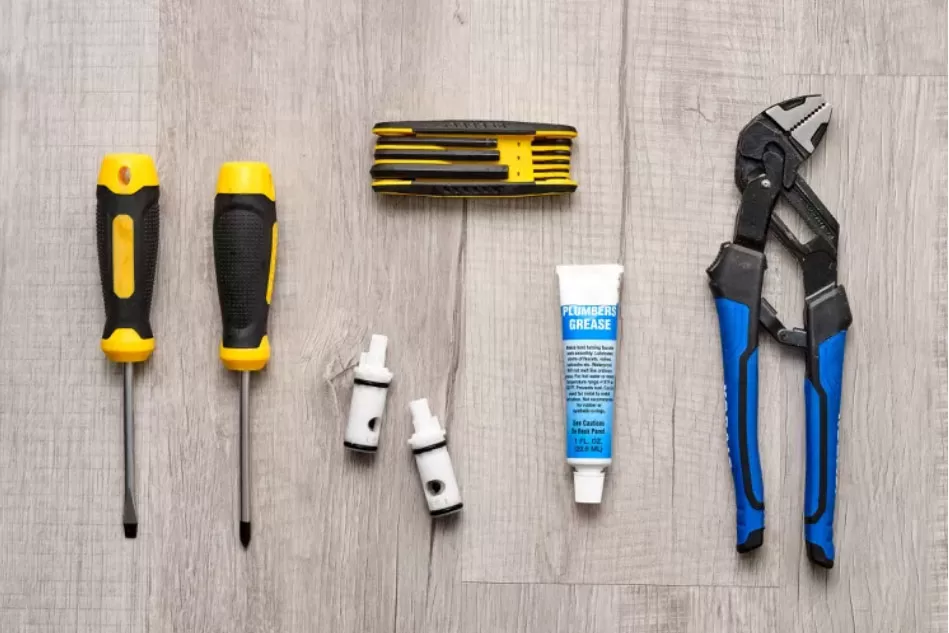 Adjustable wrench
Screwdriver (flathead or Phillips)
Replacement cartridge or O-ring
Grease (optional)
Step 1: Turn off the Water Supply
Before you start repairing the faucet, you need to turn off the water supply to the sink. You can do this by turning off the shut-off valves under the sink or by shutting off the main water supply to your house.
Step 2: Remove the Faucet Handle
To access the cartridge or O-ring that needs to be replaced, you need to remove the faucet handle. Look for a set screw on the handle, which is usually located on the side or under the handle. Use a screwdriver to remove the set screw, and then pull the handle off the faucet.
Step 3: Remove the Cartridge or O-ring
Once you have removed the handle, you will see the cartridge or O-ring inside the faucet. Use an adjustable wrench to remove the retaining nut that holds the cartridge or O-ring in place. Pull the cartridge or O-ring out of the faucet.
Step 4: Replace the Cartridge or O-ring
Inspect the cartridge or O-ring to see if it is damaged or worn out. If it is, replace it with a new one of the same size and model. Apply some grease to the new cartridge or O-ring before inserting it back into the faucet.
Step 5: Reassemble the Faucet
Once you have replaced the cartridge or O-ring, reassemble the faucet in reverse order. Insert the cartridge or O-ring back into the faucet and tighten the retaining nut with an adjustable wrench. Replace the handle and tighten the set screw with a screwdriver.
Step 6: Turn on the Water Supply
Turn on the water supply to the sink and test the faucet to make sure it is no longer dripping.
If your single-handle faucet is still dripping after you have replaced the cartridge or O-ring, there may be a more serious issue that requires professional help.
Repairing a dripping single-handle faucet is a simple and affordable DIY project that can save you money on your water bill. With the right tools and some basic knowledge, you can fix your faucet in no time. Check out the video below for a visual guide on how to repair a dripping single-handle faucet.
Leave a Reply